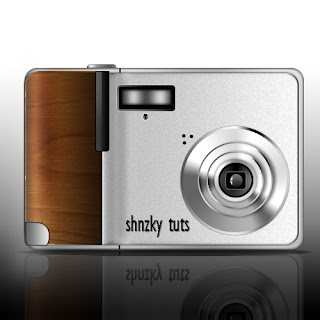
step1
In new document, create a new layer, call it “camera1”. Use Rounded Rectangle Tool (set Radius: 20px) to draw a shape like (1a) and fill it any color (1b). Then open Blending Options and setting (1c).
step2
Create new layer on top, call it “camera2”. While holding “Ctrl” down click on “camera1” to obtain its selection. Go to menu Select > Modify > Contract, set Contract By: 7px. Then fill it any color.
step3
Press Ctrl + T, right click on the image and choose Perspective. Then while holding “Alt” down change “camera2” like (3a).
Use Rectangular Marquee Tool to make the like (3b) and press Delete (3c). Then open Blending Options and use settings described in (3d).
step4
Press Ctrl + J to duplicate “camera2”, rename new layer “camera3”. Delete its Blending Options and reduce Fill to 0%. Then open Blending Options and use setting described in (4a).
step5
Use Rectangle Marquee Tool to delete the following below.
step6
Press Ctrl + J to duplicate “camera3”, rename new layer “camera3 noise”. Reduce its Fill to 100% and delete its Blending Option. While holding “Ctrl” down click on “camera3” to obtain its selection. Go to menu Filter > Noise > Add Noise, set like (6a). Then go to menu Filter > Blur > Blur. Change the layer Blending Mode to Multiply and reduce Opacity to 7% (6b).
step7
Create new layer on top of “camera1”, call it “camera right”. Move it left like (7a). Repeat step 2. Then make the selection like (7b) and press Delete.
Press Ctrl + T, right click on the image and choose Perspective. While holding “Alt” down change “camera2” like (7c). Then open Blending Options and use settings described in (7d).
step8
Press Ctrl + J to duplicate “camera right”, rename new layer “camera right shadow”. Move it under “camera right” in Layer tab (8a). Delete its Blending Options and delete like (8b). Then open its Blending Options and use setting described in (8c).
step9
Add “wood texture” and change its Blending Mode to Multiply.
step10
The right earpiece. Create new layer on top of “wood texture”, call it “right bottom”. Use Rounded Rectangle Tool (set Radius: 20px) to draw like (10a) and fill it any color (10b). Then while holding “Ctrl” down click on “wood texture” to obtain its selection. Press Ctrl + Shift + I to reverse this selection and press Delete (10c). Open Blending Options and use settings described in (10d).
step11
Press Ctrl + J to duplicate “right bottom”, rename new layer “right bottom noise” and delete its Blending Options. While holding “Ctrl” down click on “right bottom noise” to obtain its selection. Go to menu Filter > Noise > Add Noise, set like (6a). Then go to menu Filter > Blur > Blur. Change the layer Blending Mode to Multiply and reduce Opacity to 20%.
step12
Add more light and shadow for the camera.
step13
Create new layer on top, call it “zoom1”. Use Elliptical Marquee Tool to draw the circle like (13a) and fill it any color. Then open Blending Options and setting (13b).
step14
Create new layer on top, call it “zoom2” and draw the circle like (14a). Then open Blending Options and use settings described in (14b).
step15
Create new layer on top, call it “zoom3” and draw the circle like (15a). Then open Blending Options and use settings described in (15b).
step16
Create new layer on top, call it “zoom4” and draw the circle like (16a). Then open Blending Options and use settings described in (16b).
step17
Create new layer on top, call it “zoom5” and draw the circle like (17a). Then open Blending Options and use settings described in (17b).
step18
Create new layer on top, call it “rounded zoom”. Use Rounded Rectangle Tool (set Radius: 20px) to draw like (18a). Then open Blending Options and use settings described in (18b).
]step19
Make “zoom light1” and “zoom light2” to the following below.
step20
Add text to the zoom.
step21
Create new document on top, call it “flash1”. Use Rounded Rectangle Tool (set Radius: 5px) to draw to the following below.
step22
Create new layer on top of “flash1”, call it “flash2”. While holding “Ctrl” down click on “flash1” to obtain its selection. Go to menu Select > Modify > Contract, set Contract By: 5px and fill any color for “flash2”. Then open Blending Options and use the below settings.
step23
Press Ctrl + J to duplicate “flash2”, rename new layer “flash3” and reset its Blending Options like below.
step24
Add some black dots.
step25
Create new layer on top; call it “black bar”. Use Rounded Rectangle Tool (set Radius: 4px) to draw like below.
step26
Press Ctrl + J to duplicate “black bar”, rename new layer “light bar”. Delete its Blending Options and fill white color. Then use Rectangular Marquee Tool to delete like below.
step27
Create new layer on top, call it “button”. Use Rounded Rectangle Tool (set Radius: 5px) to draw like below.
step28
Add 2 small lines.
ste29
Create new layer under “camera1”, call it “camera shadow”. Use Eliptical Marquee Tool to make the selection like (29a), fill it black color (29b). Then go to menu Filter > Blur > Gaussian Blur and set like (29c).
The Raven Image
EMOTIONAL INTENSE

The HOUSE

shnzkytuts

THE SC

my heart is in you..

the flute player

shnzky in blur


